CLIENT BILLING
The timer can be used to provide a total, which you can then bill for.
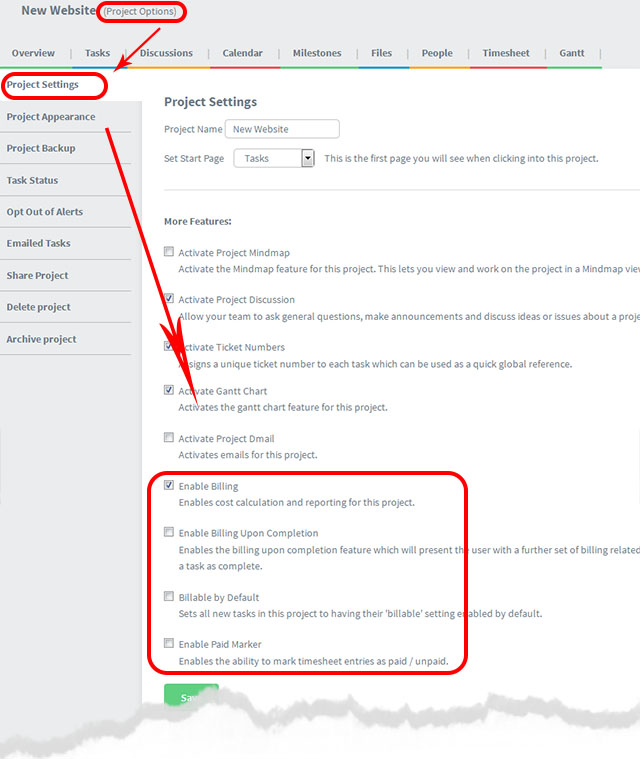
Billing is activated on a per project basis.
*(Open the project and use the Project Options tab (see below)
There are 3 billing options
Option 1: “Enable Billing”
This starts the billing feature for that project.
Option 2: Enable Billing Upon Completion
This will present the user with a further set of billing related options when marking a task as complete.
When you mark a task as complete it will bring up the billing pop up. (This looks similar to the Time and Cost pop up but allows you to also overide the completed date).
Complete the duration and notes and click “Add”. When you click “Save” and close it the billing info is saved against the task. You can now see this billing info in the timesheets.
Option 3: Billable by Default
Ticking this option simply sets all new tasks in the project to having their ‘billable’ setting enabled by default.
Billable tasks are tasks you’ve decided to charge a client for. These can be filtered on the timesheet and exported to a third party invoicing tool.
Questions?
 Visit our FORUM